
Ghee Whiz!
In keeping with my theme of easy recipes–if you can even call them recipes, I realized I have never taught you guys how to make ghee, also known as clarified butter. Ghee whiz! What kind of Real Food Blogger/Chef do I think I am? Talk about dropping the ball. Hopefully you’ll forgive me this teensy transgression because I feel terrible that it’s taken me so long to share this little gem of a kitchen staple with you.
I’ve been using clarified butter since my favorite French chef-instructor taught us how to make it in culinary school. I think I made it once, years before I ever went to school, back when I was rocking my inner Food Network cook, but I honestly can’t remember if I did or not. I guess it doesn’t matter. I make it now and that’s all that counts.
Dropping some knowledge on you; butter is made up of butterfat, milk solids and water. Clarified butter is the translucent golden-yellow butterfat left over after the milk solids and water are removed through low, gentle cooking. I’m pretty sure the Yellow-Brick Road was made out of clarified butter.
Clarified butter is great for sautéing and pan-frying because it doesn’t burn as easily as regular butter, so you can use it for cooking at hotter temperatures. For example, ordinary butter will start to smoke at around 350 F, while clarified butter can be heated to at least 450 F before it reaches its smoke point. Smoke point is the temperature at which oil starts to break down and begins to smoke. Keep heating this oil and you’ll have yourself a little pyrotechnics show. I’m all for a little flame when I’m cooking, but an oil fire es No Bueno, mi Amigos.
If I’m going to pride myself on teaching you guys (French) cooking basics then I should probably mention that ghee is slightly different from clarified butter in that it’s usually been cooked longer to decrease the moisture and deepen the flavor, and sometimes is seasoned with turmeric, fenugreek, or another spice. I don’t cook mine once I’ve skimmed off all the foam and milk solids; I strain it and jar it up. I also don’t add spices to mine. In its plain form it can be used interchangeably in recipes.
One reason I don’t continue to cook it is that it doesn’t take long before it’ll start to turn a nutty-brown color. When this happens you have what the French call beurre [burr] noisette [nwah zette] beurre = butter, noisette= nut, because of the nut-like smell and taste. Americans call it brown butter. There’s a French Food Snob hidden deep within the recesses of my mind, so I prefer to call it beurre noisette. This brown butter can be used right away as is, with or without the foam, and it’s wonderful drizzled over steamed vegetables. It’s also amazing in chocolate chip cookies.
You can clarify any quantity of butter than your Food Hippie heart desires. If you want to make a specific quantity for a recipe, figure that you’ll lose about 25% of the volume of butter. So for example, if you start with 4 ounces of butter, you’ll end up with approximately 3 ounces of clarified butter. Be sure to use unsalted butter. Also, use a good quality grass-fed, organic (if possible) one—you’ll notice the difference once it’s reduced down. If you don’t believe me, buy a stick of generic butter and then buy a package of either Kerrygold or a quality grass-fed organic butter from your local Co-op. Break out two pans and get all Bill Nye the Science Guy on that butter. You’ll be crying over how much volume you lost with that cheap, generic butter. Can we say “Money down the drain?”
One thing I love about clarified butter is because it’s pure butterfat; it doesn’t spoil as easily as regular butter, so you can keep it for quite a long time. It’s useful in all kinds of sauce making, especially the butter-based emulsified sauces like Hollandaise and Béarnaise. The reason is that the water in normal butter tends to make the emulsion break. Clarified butter, with the water removed, eliminates this problem.
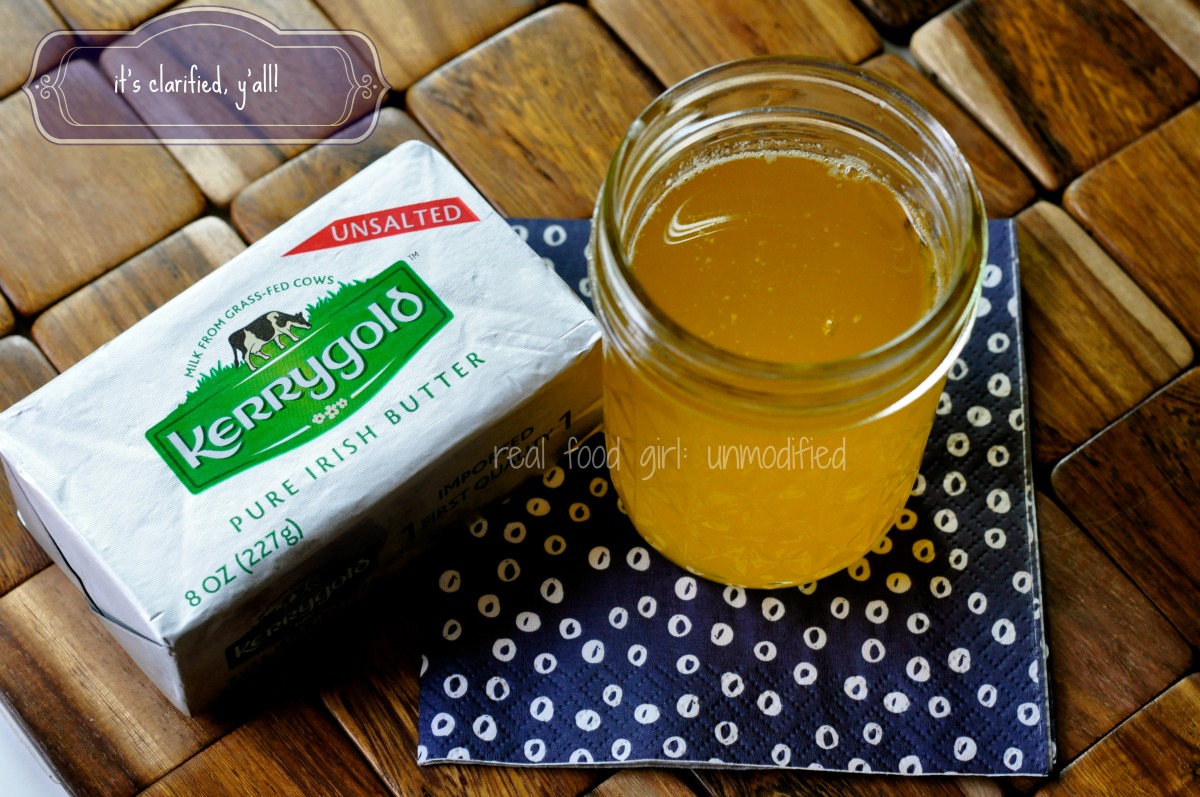
For this post I used half a pound (or two sticks, or 1 cup) of Kerrygold unsalted butter. I prefer to use a pound of hand-rolled grass-fed butter from a local farm that I get at my Co-op, but I didn’t have any on hand when I needed to make a new batch. The reason I didn’t have any on hand was because that hand-rolled butter is so epically tasty that I find myself taking little nibbles from it and before you know it. It’s gone. I typically mourn the gone-ness of my hand-rolled butter by wearing black for a few days until I can buy more. But I’m weird like that.
Are you ready to clarify some butter? Don’t be nervous. Remember slow is the way to go. If you try to clarify it too quickly by using higher heat, you’ll end up with something other than clarified butter.
Make sure you have a small bowl handy for your skimmed foam/milk solids, a spoon (I use a gravy spoon because it’s bent in such a way that makes skimming a breeze) some cheesecloth/muslin and a small saucepan. Of course, you’ll also need some butter.
Clarified Butter~Ghee
Recipe by: Some arrogant French dude. Possibly.INGREDIENTS:
- 8 ounces organic, grass-fed unsalted butter. Best quality brand you can afford, cut into cubes
DIRECTIONS:
- Heat the unsalted butter in a heavy-duty saucepan over very low heat, until it’s melted. Let simmer gently until the foam rises to the top of the melted butter. The butter may splatter a bit, so be careful. You’ll hear crackling during this process. That is just the water evaporating.
- Once the butter stops crackling, and no more foam seems to be rising to the surface, remove from heat and skim off the foam with a spoon. (It can be saved and added to soups, popcorn, pilaf, or a bowl of warm oatmeal.) NOTE: I typically skim as I go. Don’t worry about getting every last bit; you can remove the rest when straining it.
- Line a mesh strainer with a few layers of cheesecloth or cotton muslin, and set the strainer over a heatproof container. I like to use canning jars.
- Carefully pour the warm butter through the cheesecloth-lined strainer into the container, leaving behind any solids from the bottom of the pan.
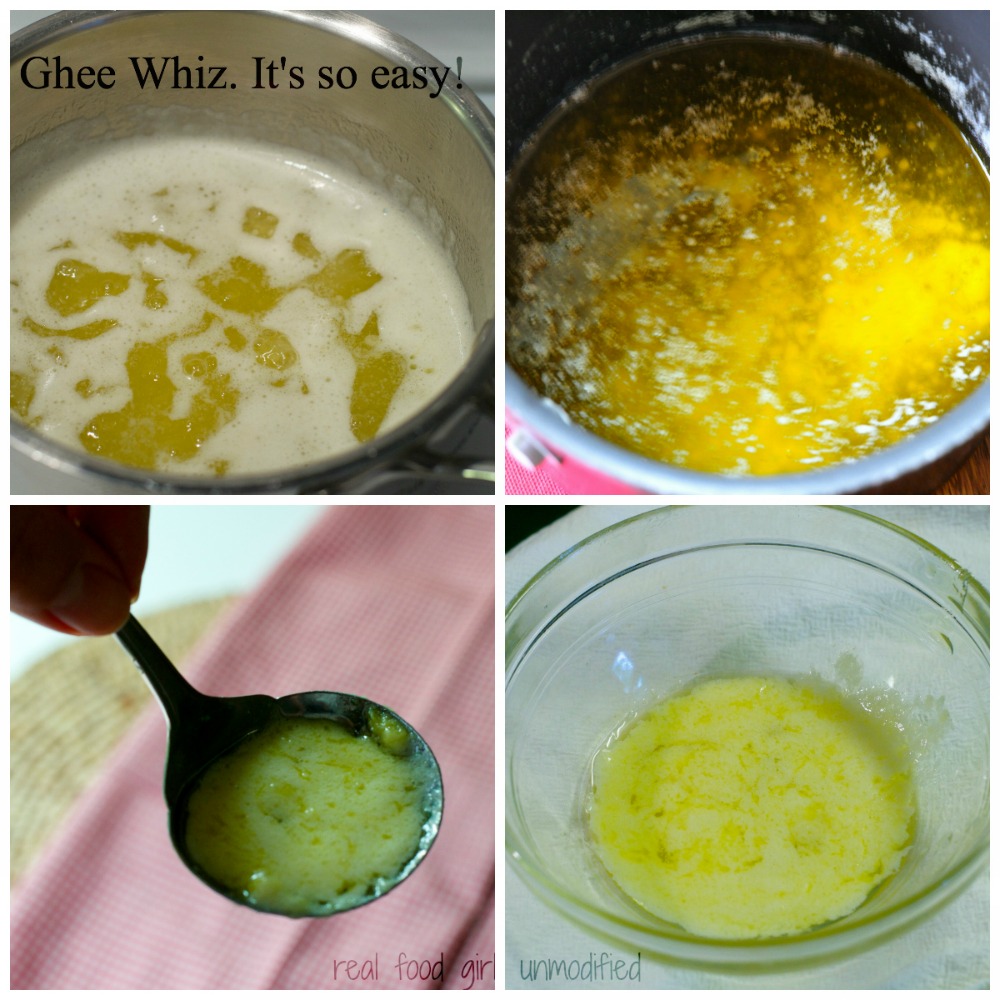
In the image below: Notice the foam rising to the top in the upper left photo. In the upper right photo you can see the milk solids at the bottom of the pan, if you swirl the pan gently, that should rise to the top so you can skim it off. Bottom left shows my fancy skimming spoon and the bottom right shows the bowl that I put the foam/milk solids in for later use. Like when I make homemade popcorn.
Storage: Clarified butter will keep for 3 to 6 months in the refrigerator. You can leave it at room temperature if the conditions are optimal, but I keep mine under refrigeration. It can also be frozen for a similar length of time. It won’t ever last that long, but it’s good information to know regardless.
PAID ENDORSEMENT DISCLOSURE: In order for me to support my blogging activities, I may receive monetary compensation or other types of remuneration for my endorsement, recommendation, testimonial and/or link to any products or services from this blog.
Kristine Cocchiarella
Classically trained Cordon Bleu chef turned anti-GMO, pro-organic, food hippie blogger with a passion for REAL food.


2 Comments
Real Food Girl
Hi Sandi.
The process of clarifying butter or ghee (and removing the milk solids/proteins) is a manual one. Generally, there is so little casein left in the final product that it’s safe for most, even those with a casein intolerance or sensitivity. However, I can’t guarantee that it won’t affect you.
If you’re up for it, try the ghee from Pure Indian Foods (http://pureindianfoods.com). They have such high quality standards, and likely will do a much better job removing the milk solids from their product than you would be able to do at home. But that’s going to be your call, because again, I’m not sure they can 100% guarantee that there are zero proteins remaining.
I hope this helps and I hope you’re able to give it a try. Have some Benadryl on hand.
Sandi
Thanks for these easy instructions – it looks much simpler than I thought! One question… last year I developed a milk protein (casein) allergy and have been in mourning over the loss of butter, cheese, raw milk, homemade yogurt, etc. in my life. I felt a glimmer of hope when reading this recipe. Do you think that removing the milk solids takes care of the casein? I would SO love to be able to cook with butter again! I’m desperate enough to try and risk the consequences (itchy mouth, scratchy throat, wheezing and coughing). And I could use the ghee in bulletproof coffee again – oh yum!